
A Critical Look at Mega Man 5: Proto Man Stage 1

TMMN Staff

Proto Man 1 and Music

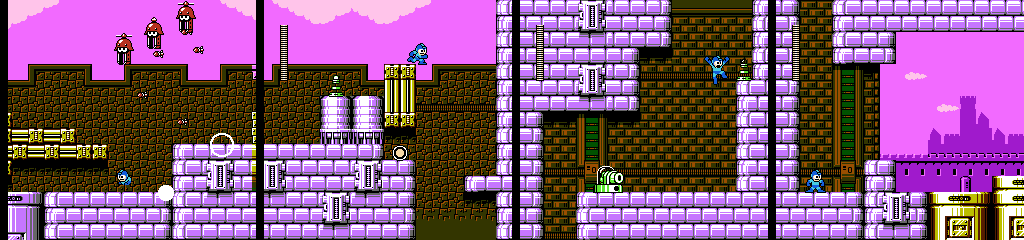
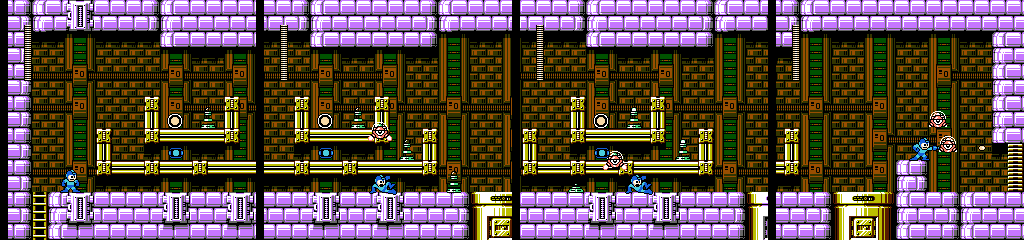
This section combines Tondeall and Sumatran, with fantastic results. As soon as the player sees Tondeall they’re likely to keep shooting, triggering the following Sumtran. The next four Tondealls are placed well, with each having to be approached differently. The following Sumatran can’t be hit easily, but his path leaves the player safe spots next to the ledges.
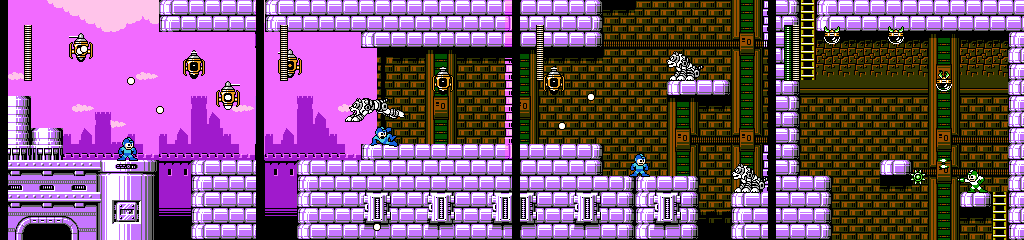
The last Tondealls appear closer together, with one out of normal shot range unless we fire while jumping down from the previous Sumatran’s platform. The next Sumatran is positioned between the higher Tondeall and another just behind him, which he will defend with his jump if we take a shot at it.
Finally, we reach two Sumatrans, the higher of which is not a threat if the player keeps moving, while the lower’s position makes him the only one easy to take out by just shooting forward. The next screen is simply a matter of triggering or destroying the Hirarians before jumping across. We then get an obligatory “Remember Rush?” moment, as the ladder is out of reach.
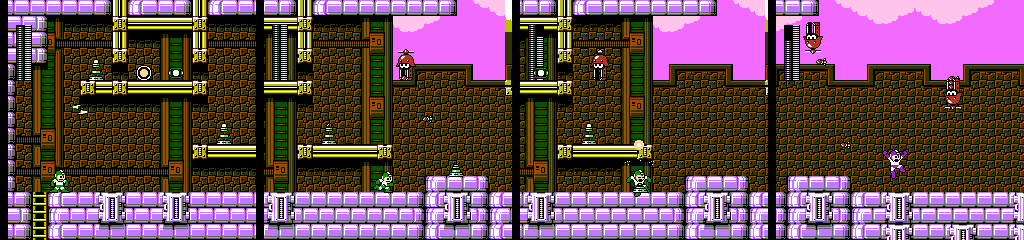
The next area pairs Subeil with Rembakun, which also work very well together. The ledge above offers some refills, but we’ll want to deal with both the Subeil on the ledge and the one under the exit before grabbing them. Simply running forward provides cover from the first Rembakun, but there’s also a Subeil waiting at the other side to catch a distracted player.
Rembakuns then start bombing the whole place. Since they’re out of range and Star Crash won’t protect us, Gravity Hold is the best option here.
We get another Rush area here, but this one is at least a little more interesting in that we have to put some effort into making it over with one Jet use, or spend another of our items from the small ledge. The following area is similar to the first, with the lower path providing shelter and a Subeil waiting on the other side. Since it’s on our level, this one is harder to kill and gives us less time to react. We have plenty of tools to handle it, but we could also lead it back against the wall and let it follow us through to prevent another from spawning.
Rembakun serves us a heavy payload of screen flicker before we leave. Twin Cannon waits below, but its true purpose is to distract us from the Subeil we trigger on the way down.
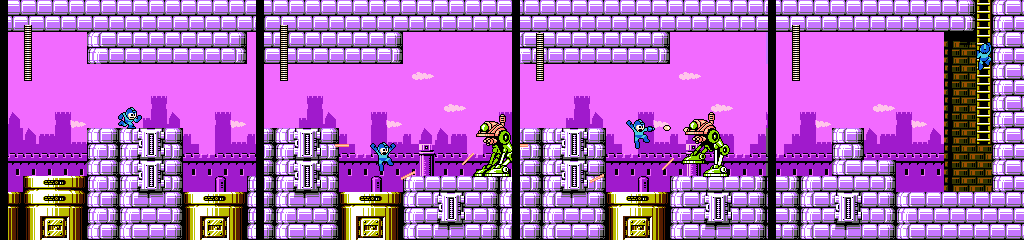
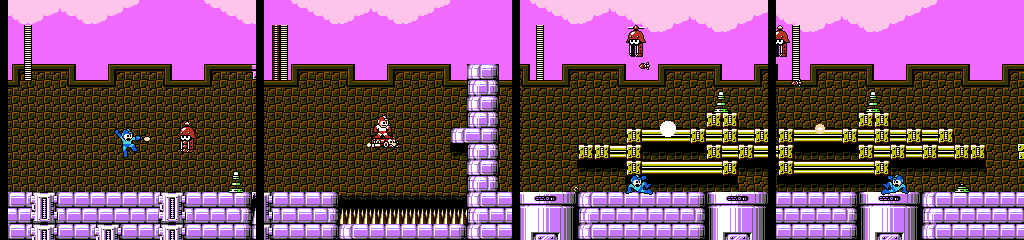
After a couple empty screens, we come up against Dachone. This one is actually a little threatening, as we have a wall to our back and the extra height makes it harder to hit and allows its angled lasers to come into play. It still doesn’t deserve an entire hallway to itself, but the terrain suits it perfectly.
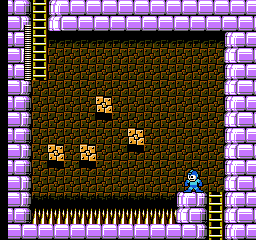
These vanishing block rooms are more complex than usual. The first gives us a choice of an upper or lower path, but there are many more blocks than necessary, both to confuse the correct path and to give the player a break if they fall. I particularly like that after the upper left block appears, another shows up to the right of the lower left one, allowing players an escape if they miss an attempt to jump straight up.
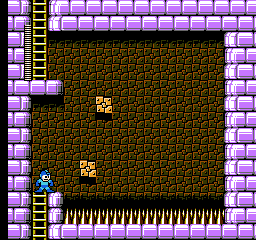
In the second room, we only need to use three of the blocks, but the first one we want appears midway through the cycle. Taking the first lower block that shows up just leads us across the spikes and back unless we jump into an upper block as it appears and get shoved upward.
More Subeils block our path forward. The bottom one is offscreen, but the other two are easy enough to deal with if we go up. Rounder appears in this area, and only in this area, to circle around us and block our shots. Since we’ve dealt with all the other enemies by now, this only serves as a novelty unless we happen to jump into one when it arrives.
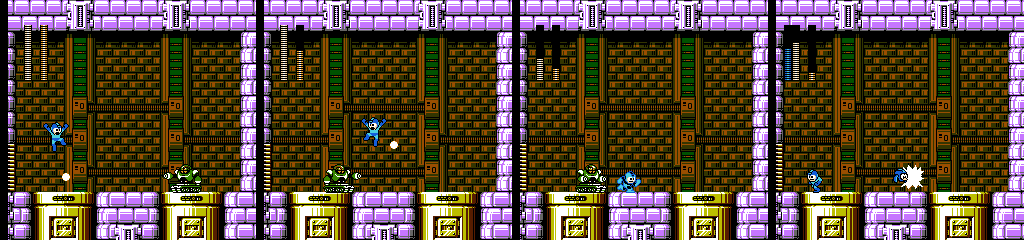
I think I can comfortably call Dark Man 1 the worst boss of the NES series. It slowly rolls forward while taking shots at us, and will immediately counter any damage taken with a shot that is faster and can be aimed upward, assuming it isn’t already in the firing animation. After roughly a third of its health is gone, it speeds up.
This is a fairly tough fight, but only because its width makes it very difficult to jump over, and it is constantly chasing us for the whole fight. It’s like if Skull Man had Doc Robot’s version of the Leaf Shield. Wave can block his shots and kill him a little faster, but Beat is the best option if you have him since you can keep running while he attacks.
Most of this stage is very impressive. The first section is one of the only moments in the series that punishes the player for shooting blindly, and everything in it has a unique and effective placement. Subeil and Rembakun also make a great pair, as each can distract the player from the other, and this stage makes an effort to place each Subeil where it can surprise the player or get in the way while something else happens.
Dachone gets terrain that shows off its potential, the vanishing block areas are clever, and in general it makes the player think more than usual. The only downsides are that Dachone’s area is otherwise empty, and Rounder’s unique design is wasted. The boss is another story, but anything more I say about it would just be a string of expletives.
Prev/Next in Category(s)
Prev/Next by Date

The Script for Mega Man Legends Timelines #1
Behold some of the first steps in how this book came together.

GOG Dreamlist Brings Back Breath of Fire IV, Could Mega Man Legends Happen Next?
Plasma Power? No, People Power!


Comments